
CAMPING ON PUBLIC LANDS: FREE OF CHARGE!
March 24, 2021
Did you know that there is federal land all over the country where you can camp for free?
Whether you are long-term RV living or or doing a short road trip with a tent, these federal lands are an amazing free resource you should be taking advantage of! In this article, I’ll cover a couple of free apps that you can use to locate these public lands.
As I embarked on this van overlanding expedition, part of my plan was to live as cheaply as possible. One of the most significant expenses one might encounter while camping is the cost of a physical space to park your van or pitch your tent. Depending on the amenities, this could cost upwards of $30 a night.
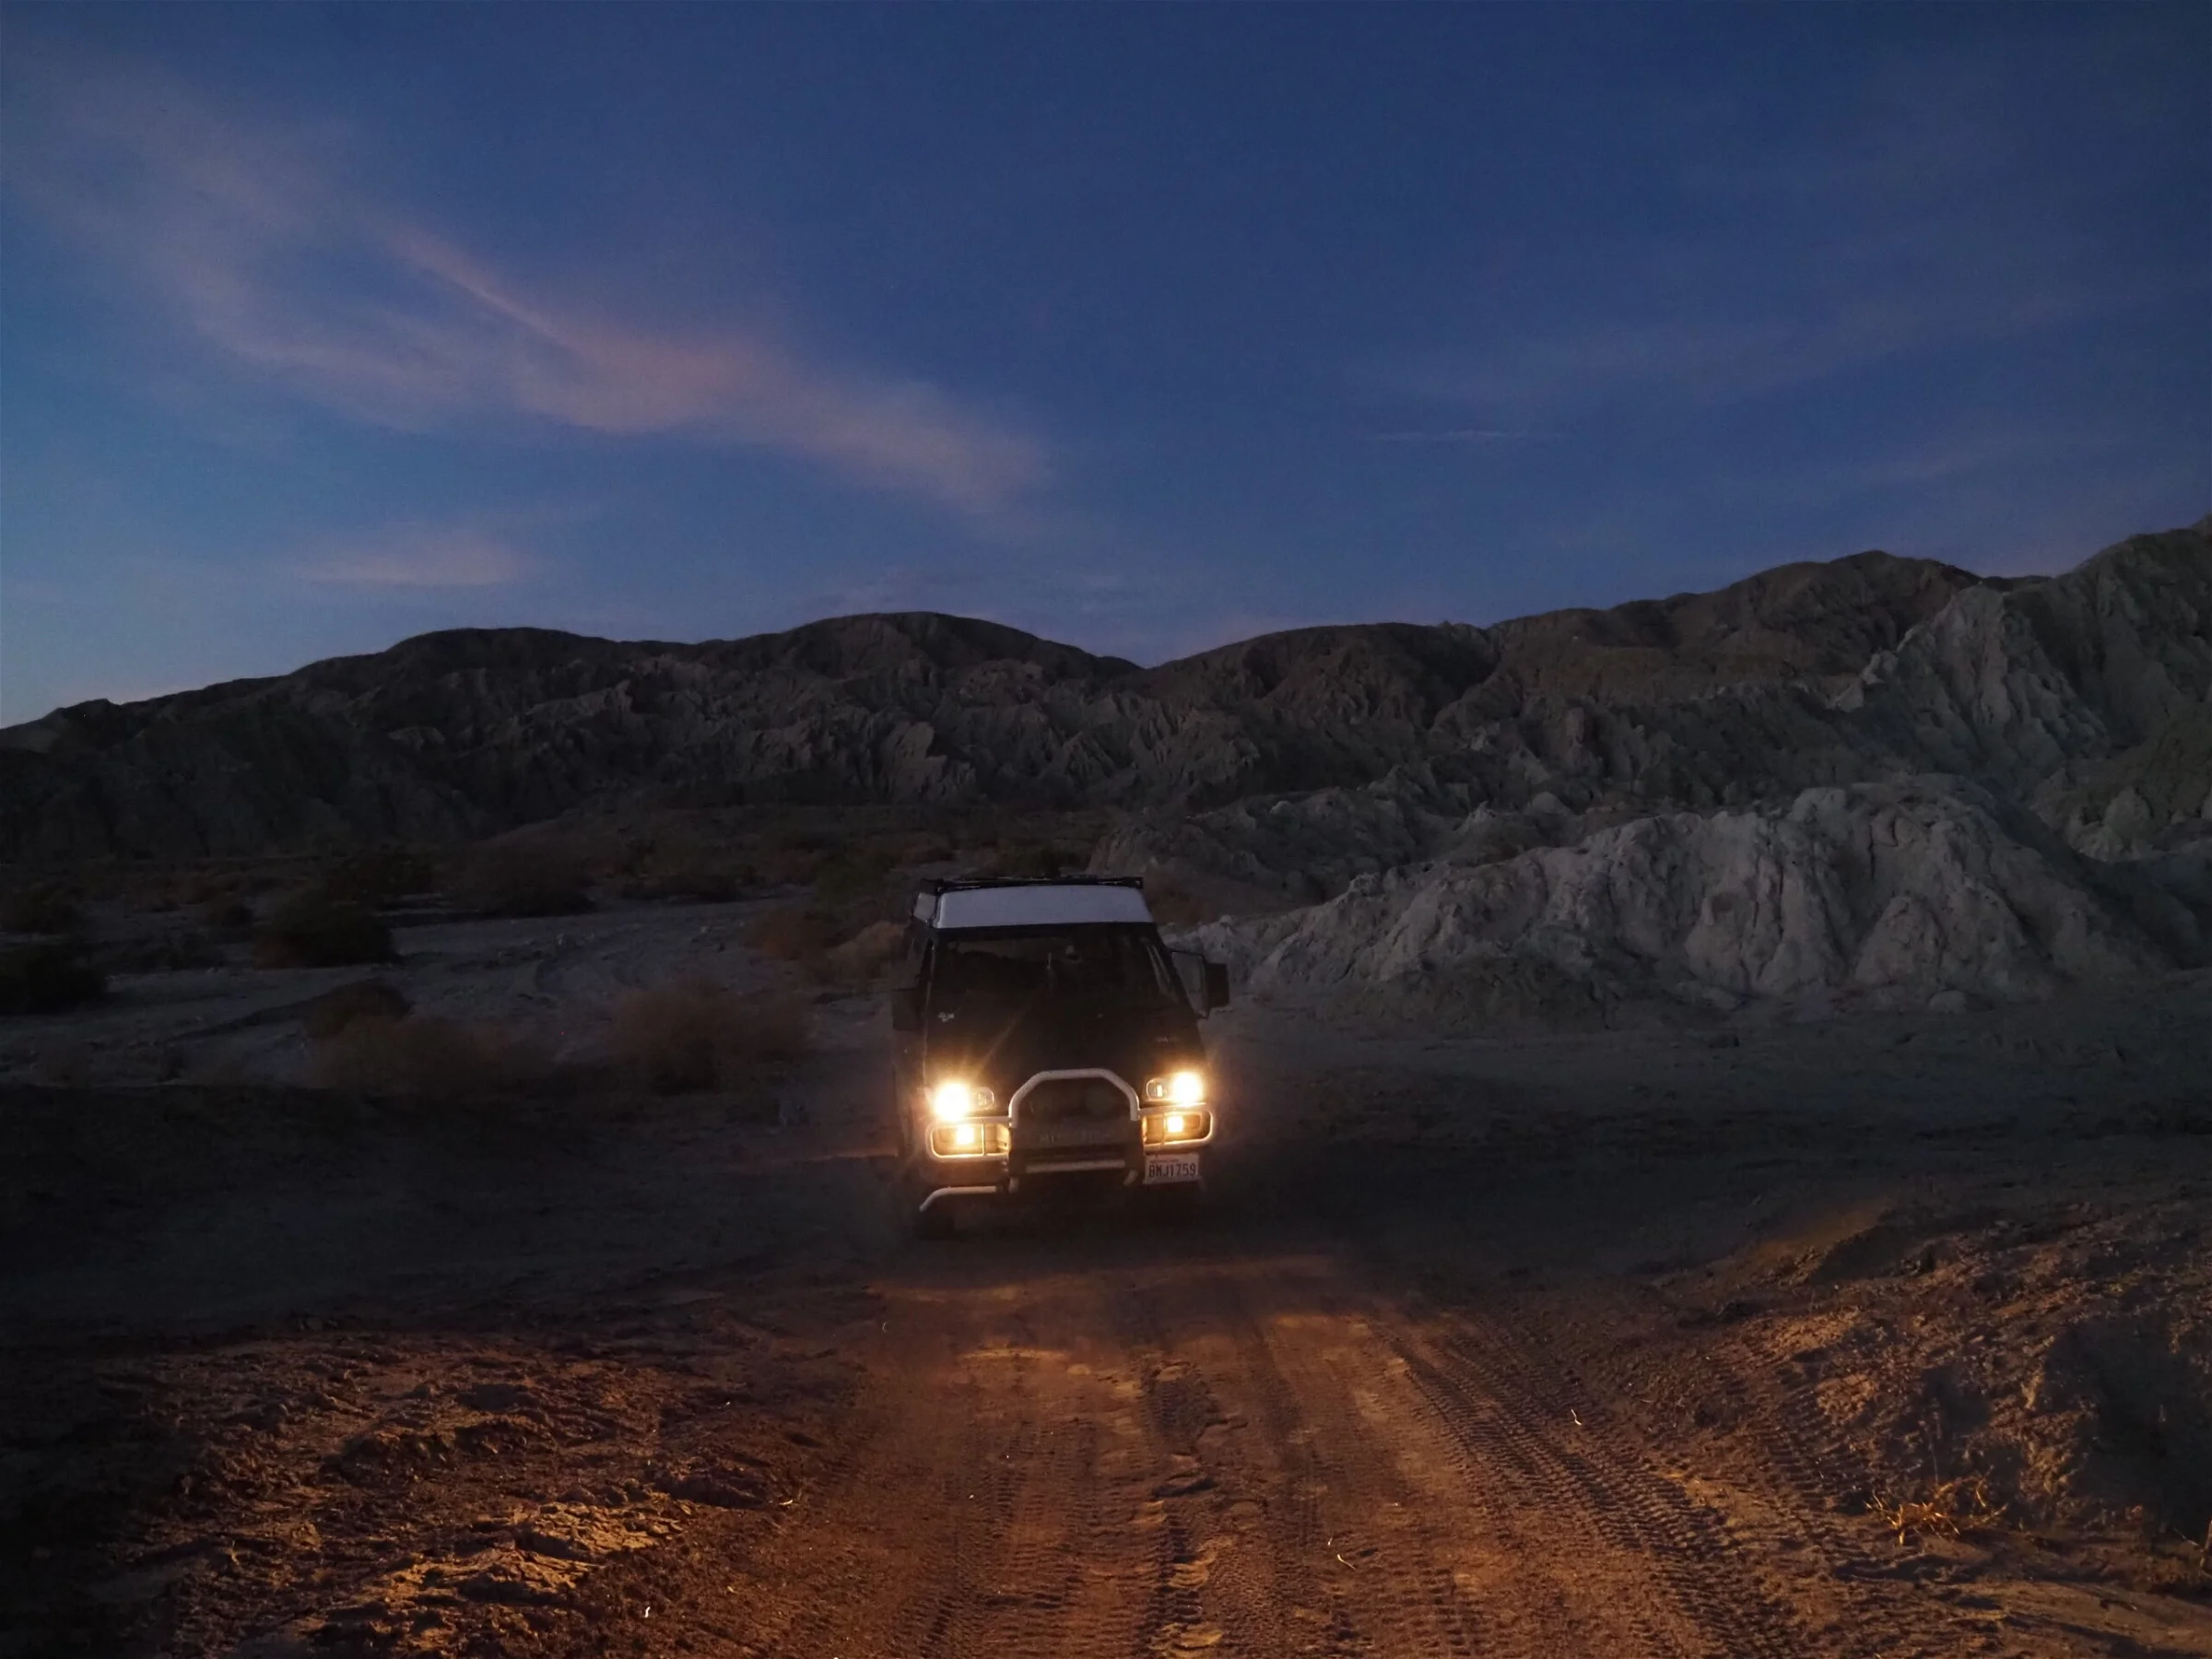
BLM land in the Painted Canyon, CA, located right near the Salton Sea.
The costs begin to add up–especially if you plan to travel for an extended period of time. I have friends and relatives who have spent more time in cities for various reasons, so they might park at truck stops, Walmart parking lots, or casinos. For my situation in my 4×4 overlanding Delica van, I’ve been spending the majority of my time outside of cities in some type of dispersed camping situation.
On these federal public lands, you can park and camp free of charge, for up to 14 consecutive days. The longest period I’ve personally stayed in one place is about a week, so I’ve never ran into any law enforcement issues. In terms of safety, I often don’t even come in contact with any other campers. Bureau of Land Management (BLM) and National Forest (USFS) land are both always open for dispersed camping unless otherwise posted. You can find BLM camping information on the US Department of the Interior’s website here. You can find information about “dispersed camping” rules on National Forest land on the United States Department of Agriculture website here.
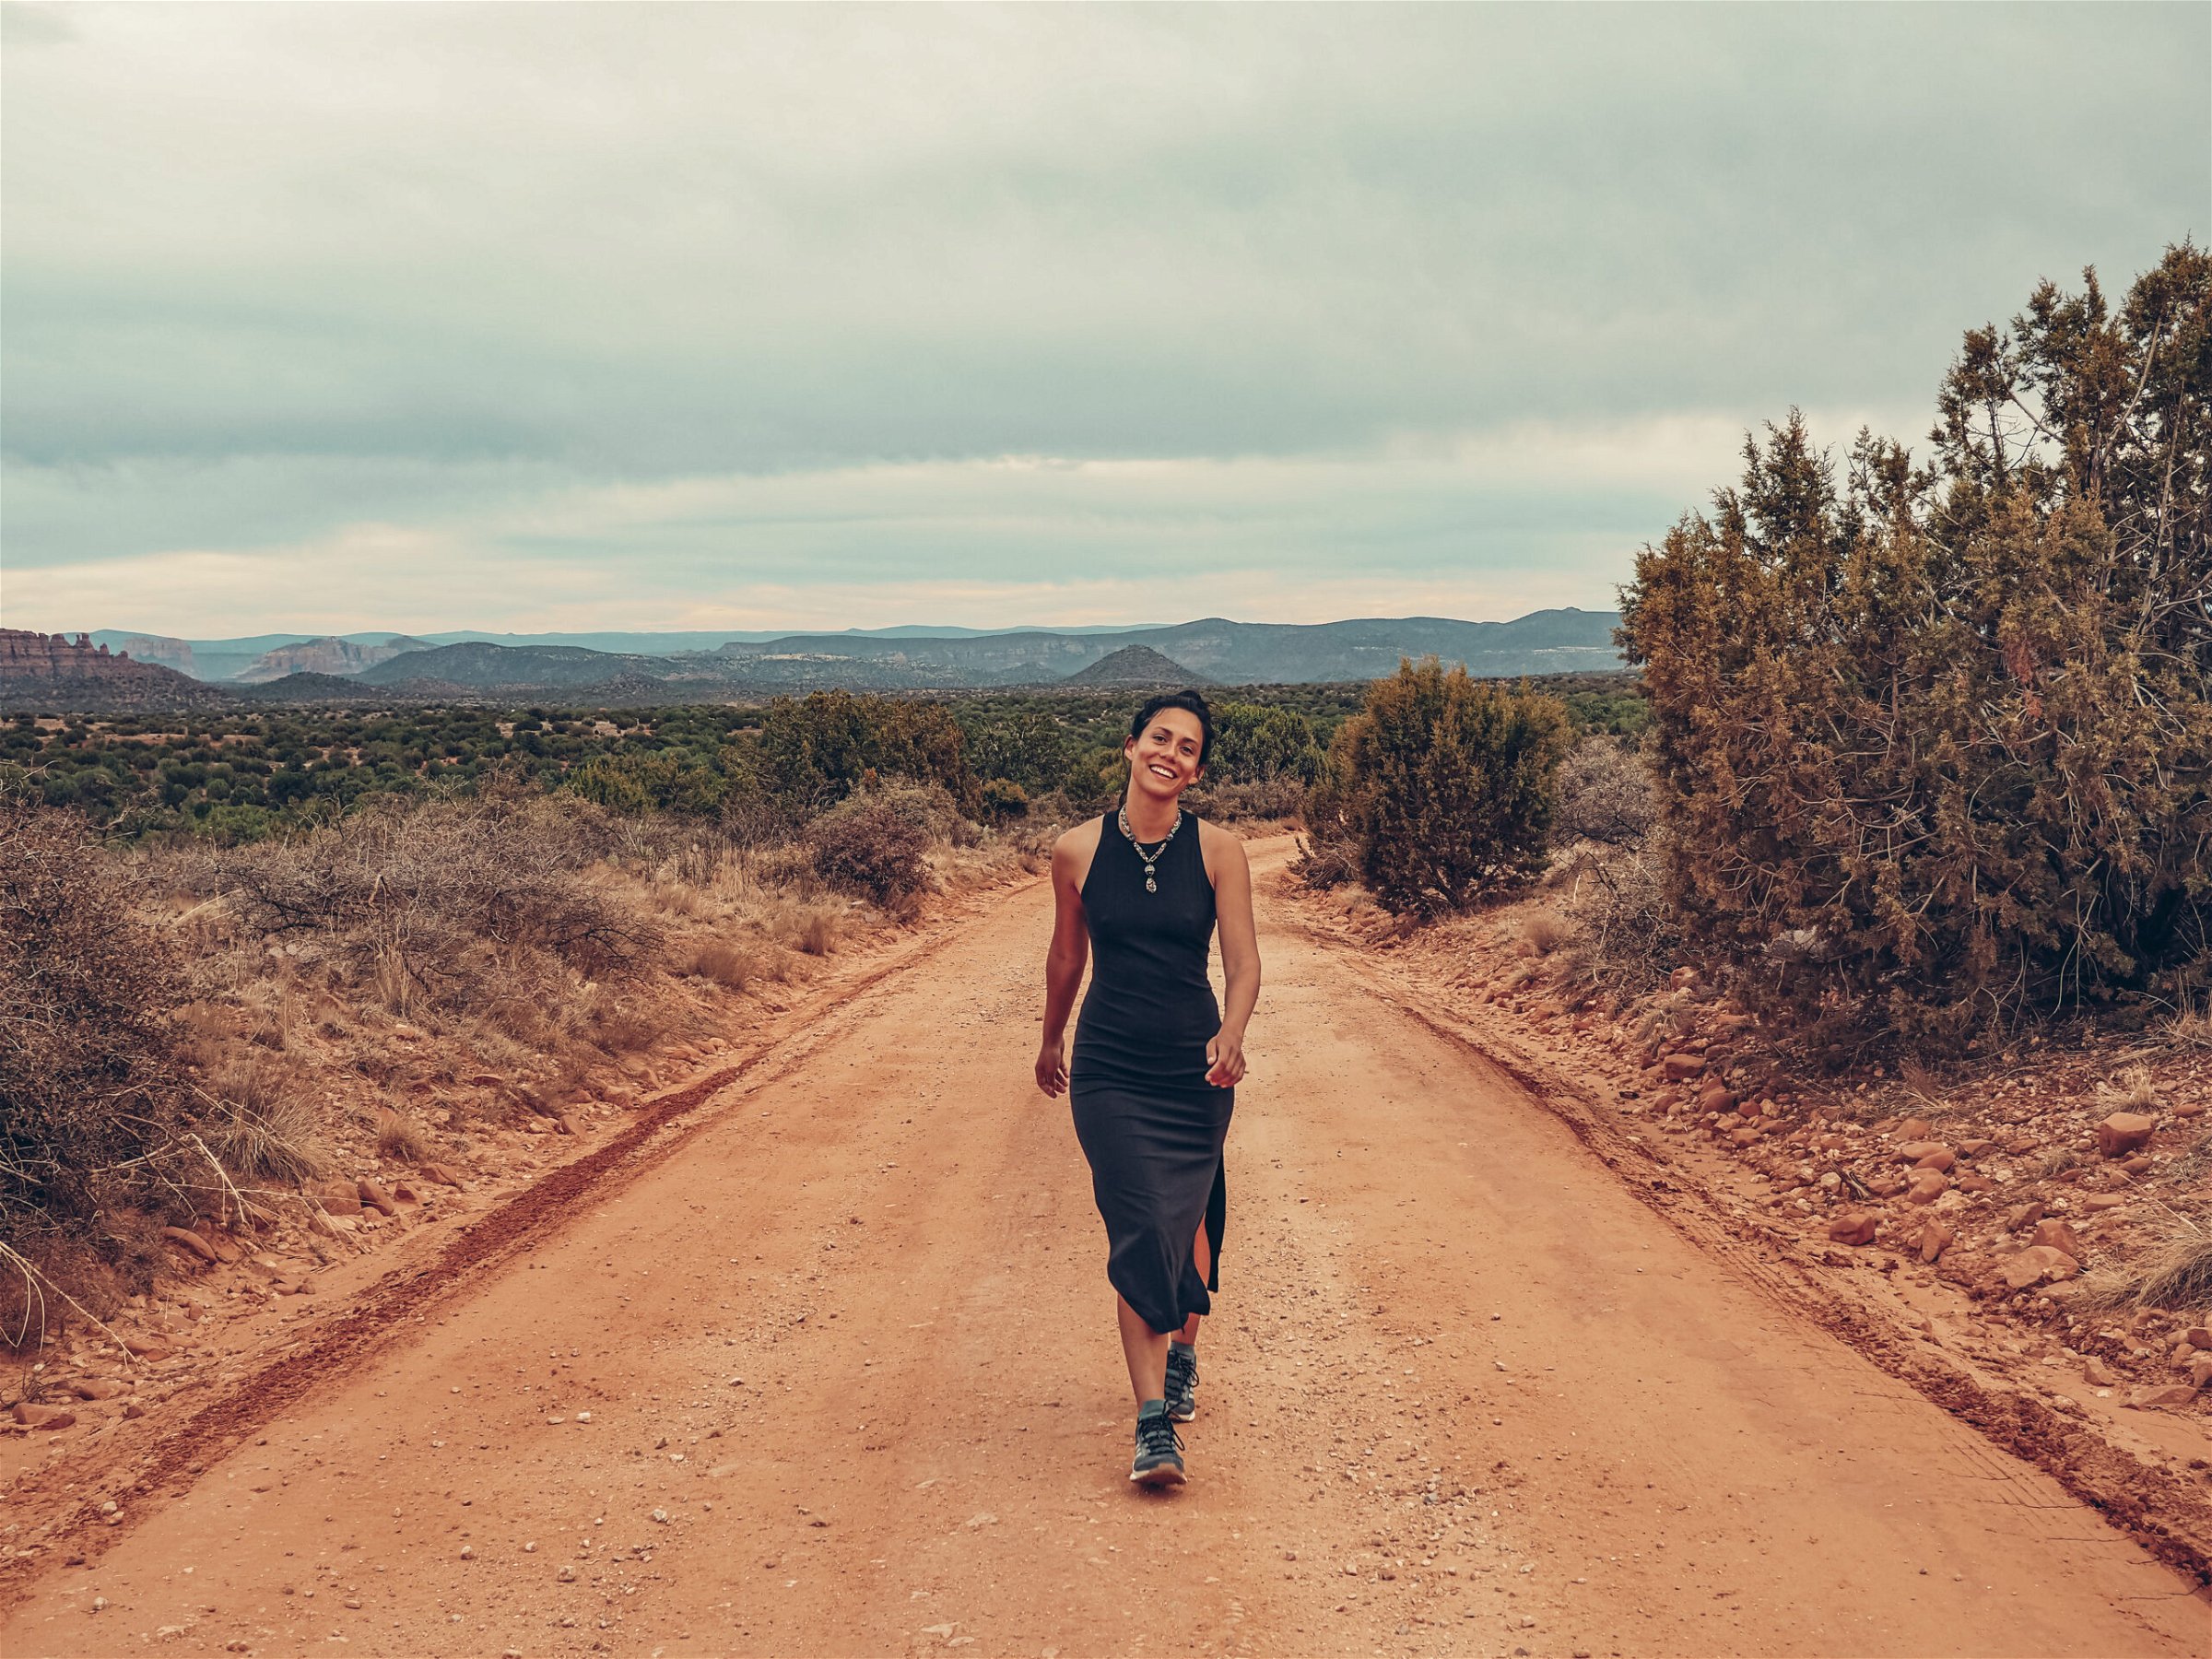
National Forest land outside of Sedona, AZ.
There are many ways to locate these federal lands, including websites, maps, and apps. After spending over four months on the road, I have one app that I find myself returning to over and over again: FreeRoam. The second app I go to is iOverlander, but hands down the app I use most frequently is FreeRoam!
I’m going to provide a description of both apps and show you a preview of what you can expect along with basic instructions. Both of them are FREE, which was important to me. There are plenty of paid apps out there, and some are “free” but you still have to pay for a “pro version” to access many of the same features that FreeRoam or iOverlander offer at no cost. Some may have some better attributes, but I’m homeless and unemployed, so I ain’t messing around with paid apps!
FREEROAM: MY GO-TO APP
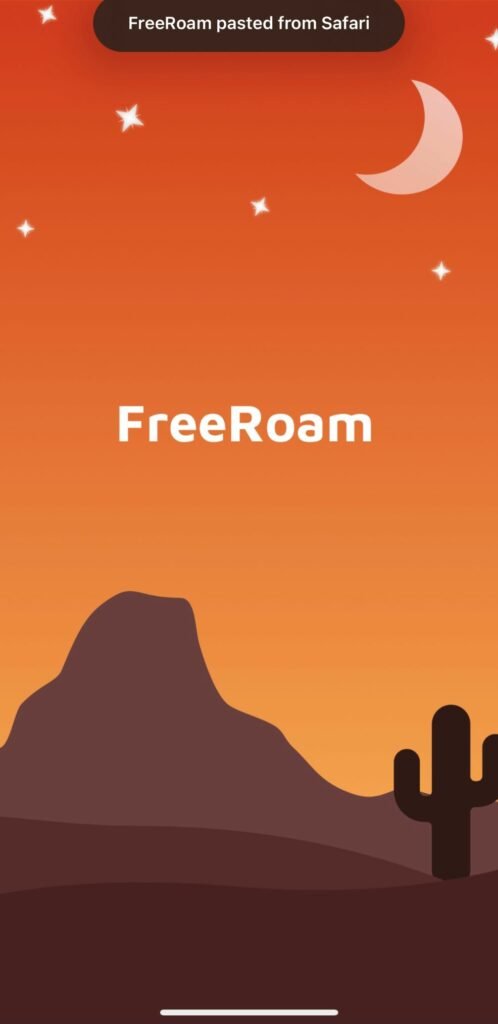
From FreeRoam’s website, “FreeRoam is a 501(c)3 nonprofit seeking to connect campers with nature in a sustainable way.” What’s amazing about this app is that it offers most features I’ve seen that every other app offers in their paid/pro versions. The photos below show the opening screen of the app–which includes the logo–and a view of the entire United States.

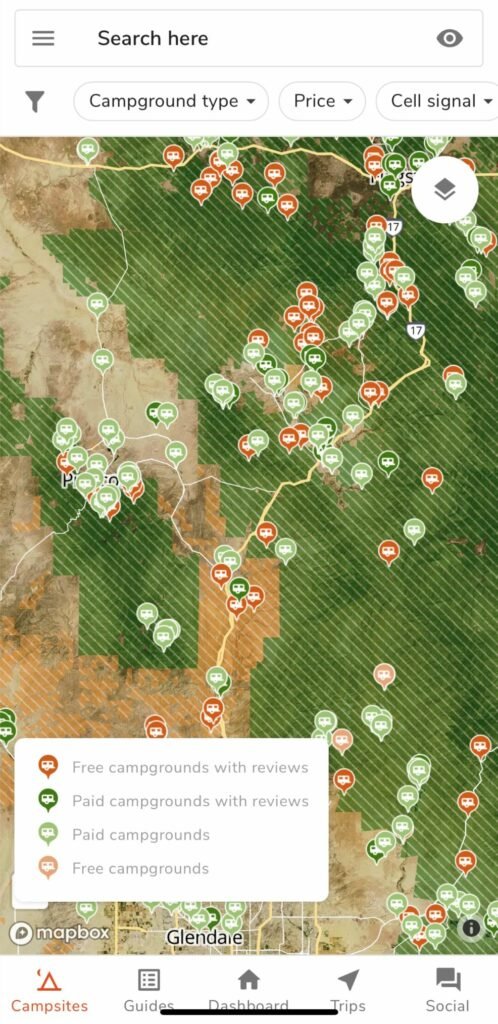
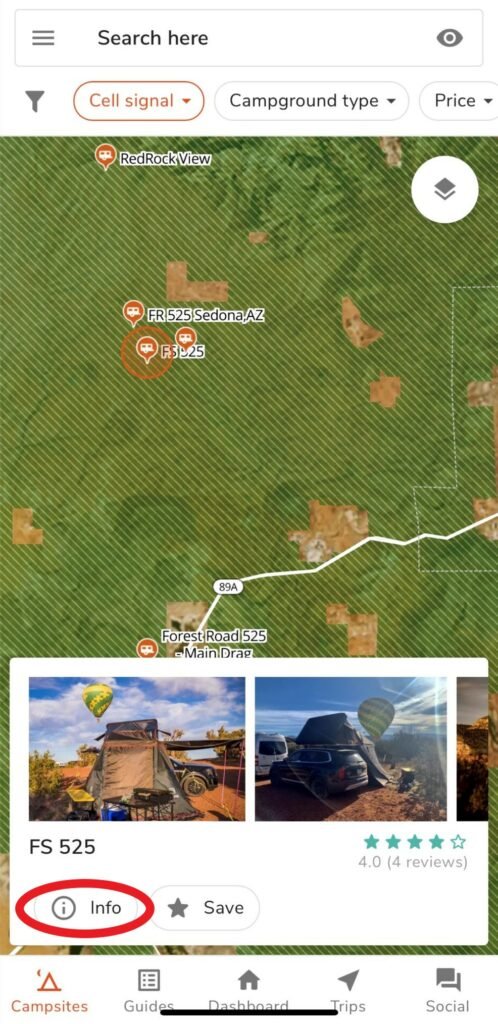
Recently, I visited Sedona, Arizona. Of course, I checked FreeRoam to see where I could camp nearby! When you zoom in on an area, you can see the different types of camping that are available. In the photo below, you’ll notice the legend in the lower left-hand corner of the screen. Paid, unpaid, paid with reviews, and unpaid with reviews. I usually start my search by going through the dark orange icons in the area I want to camp. As you’re perusing sites, you can tap on ones that you’re interested in learning more about. As you see below, I tapped on “FS 525.” Based on what I already knew about the area, I knew this was named after Forest Service Road 525. This app allows users to populate their own information and campsites they’ve found, so people can name these sites whatever they prefer. If you like what you initially see, you can tap on “Info,” which is circled below in red.
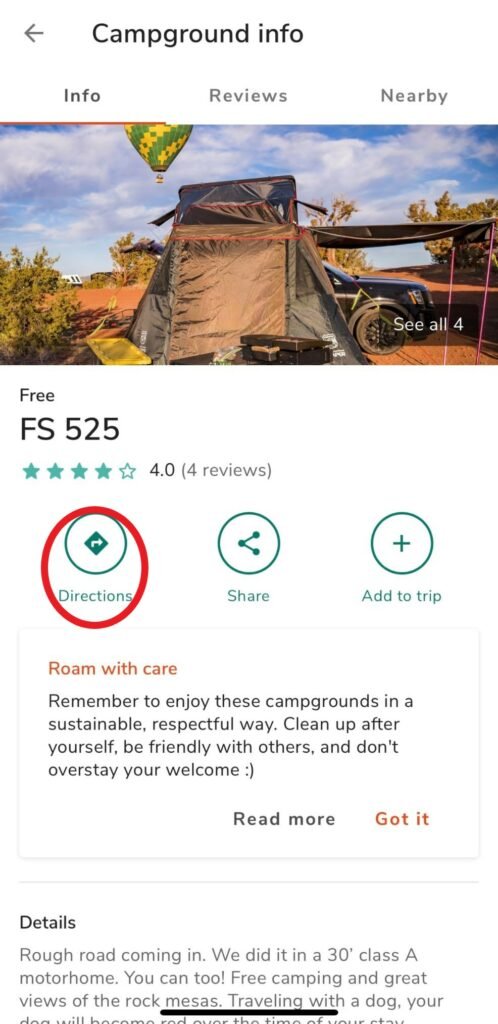
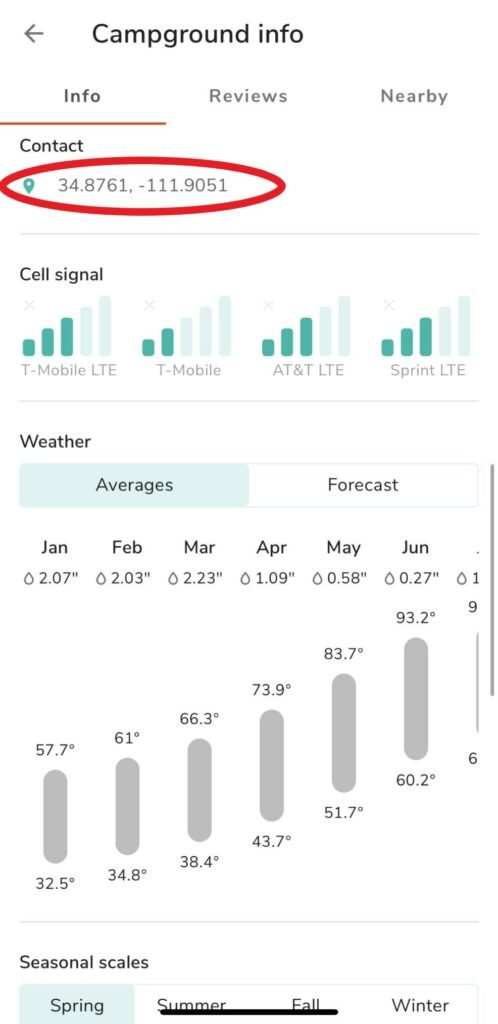
Under the info tab, you can find the grid coordinates of the site, the available cell signal, and the weather. Since we require some internet for work, the cell service feature is really useful! You can navigate to the site by tapping the “directions” button in the app, or by copying the coordinates listed under “Contact” and pasting them into your GPS app.
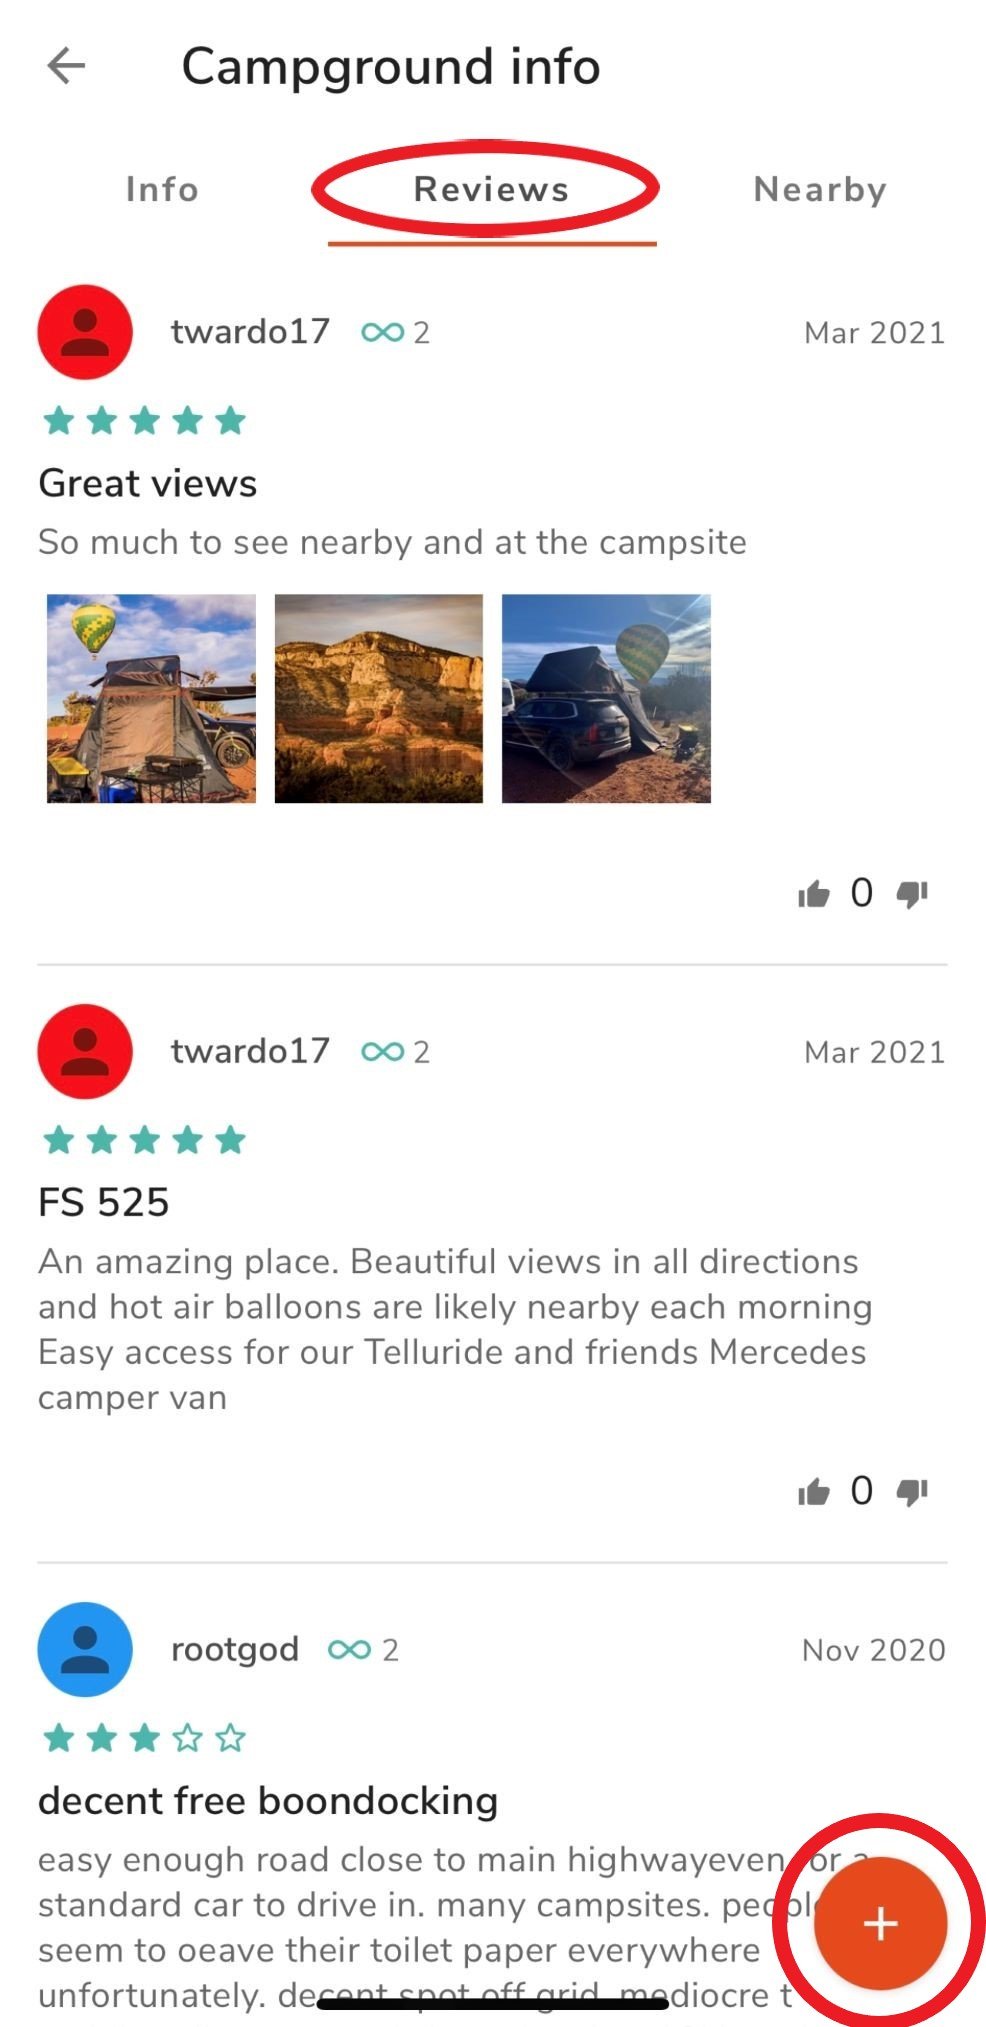
After looking over the general information about the campsite, you can tap the “Reviews” tab and see what people have to say. It’s very helpful when people provide key details about bathroom facilities or what the road conditions are approaching the site. You can add your own review by tapping the red plus sign in the bottom right-hand corner of the screen.
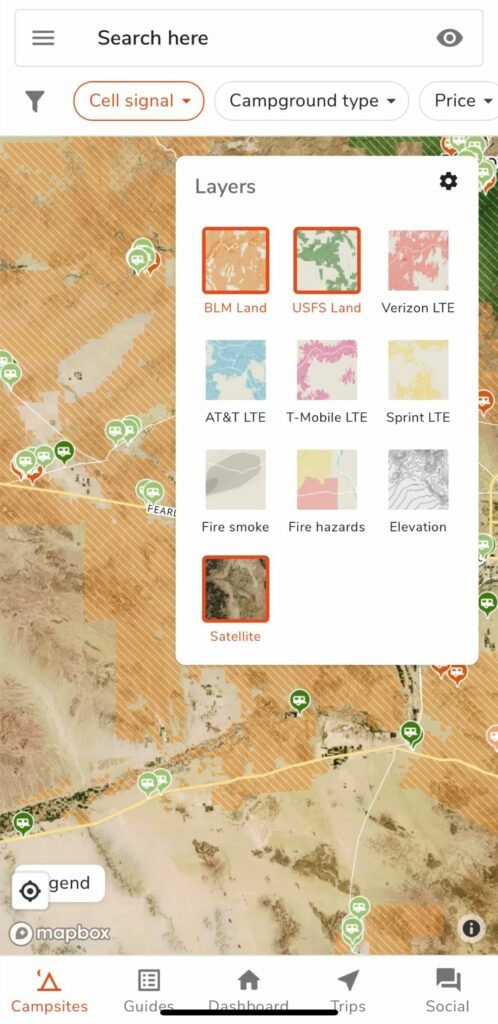
If you’re feeling adventurous and have more time and daylight to explore, you can use FreeRoam to simply locate BLM and National Forest land where you are permitted to park and/or camp, and you can use the map to find your own new campsite not yet annotated on FreeRoam. Sometimes I’ll just zoom in to the BLM or NF land along my route and look for side roads that lead to clearings that appear to have space to park! Make sure to activate the satellite imagery layer when you’re doing this.
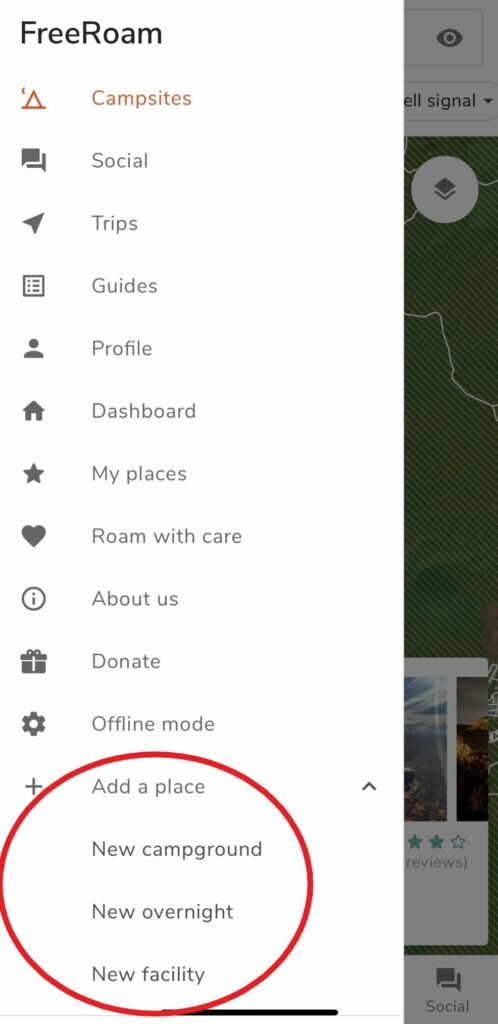
Below you’ll see the in-app options for map layers. If you do locate a new campsite and it’s worth sharing, take the time to go to the FreeRoam menu to “Add a new Location.” This app thrives on user-populated data. If you have the ability to, it’s nice to practice some reciprocity and leave a review or some photos for other users, just like other people did for you! I know that I personally need to be better about this.
There’s a lot more to FreeRoam and I’ve only covered the bare essential functions of the app. These are the parts of the app I use the most, which is why I wanted to share them with you! You can learn more about FreeRoam at their website, here. The creators of the app strongly believe in enjoying nature in a responsible, sustainable way, and this is emphasized throughout the app. I’ve found it to be intuitive and user-friendly. And the best part is that it’s 100% free! There are no “pro” versions where you have to pay a subscription or one-time fee to access certain features. I love it. That being said, since FreeRoam is a nonprofit and charges no fees, you can donate to support FreeRoam and keep it running.
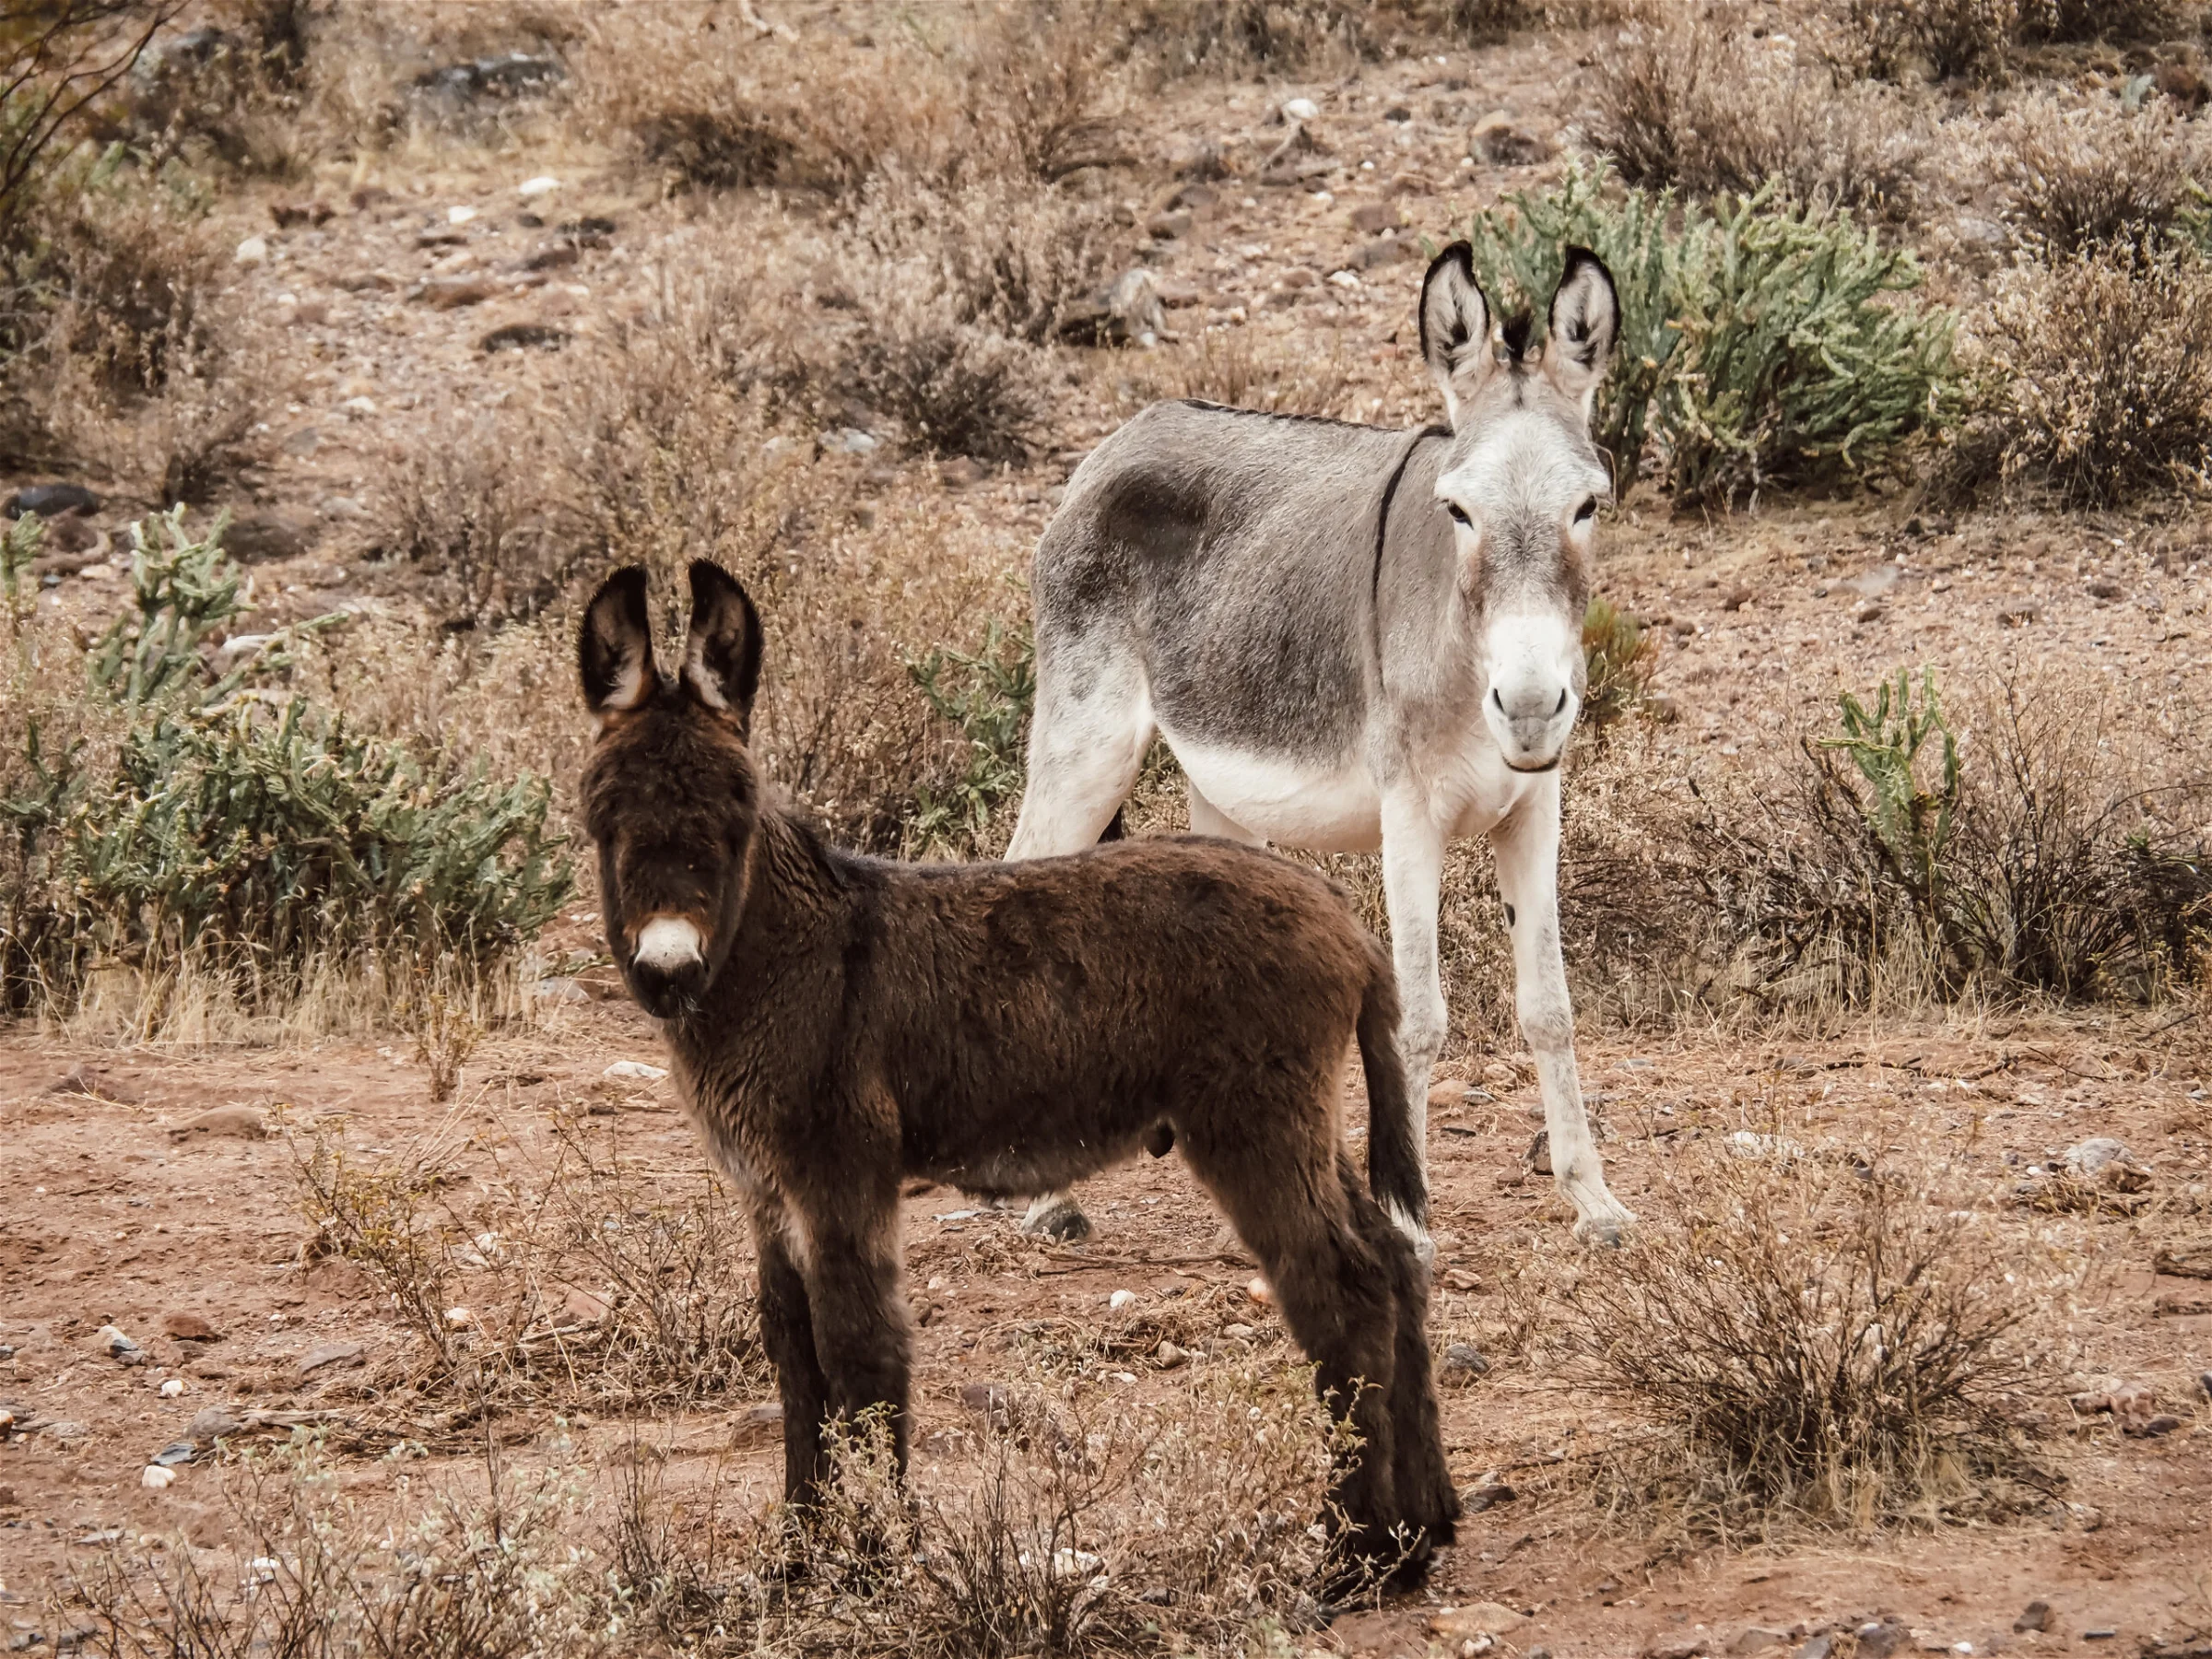
Burros on BLM land north of Phoenix, Arizona.
IOVERLANDER: MY ALTERNATE RESOURCE
If I’m having trouble finding a spot on FreeRoam, or I have enough time to do a more comprehensive search, I also use iOverlander. Like FreeRoam, this app is also a nonprofit and survives off of volunteers and donations. Straight from their website, “iOverlander’s mission is to support overland exploration of the world, while respecting local cultures, people and environments.” Before moving onto the features and functionality of the app, I want to point out what I think are the two most significant differences between the two apps. FreeRoam is exclusively in the U.S. while iOverlander is offered internationally and iOverlander not only includes camping spots, but also all kinds of amenities and points of interest like propane fuel, water points, mechanics, and laundromats. It’s very resource-based, while FreeRoam seems to be more focused on strictly spots to camp.
I don’t use iOverlander nearly as much as FreeRoam, but I’m going to make it a point to start using it more because this app provides a lot of useful information.
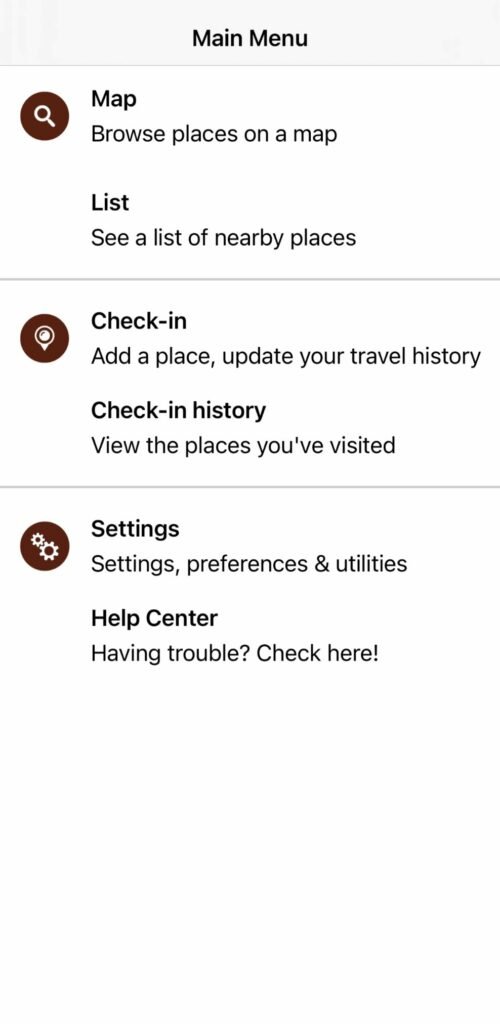
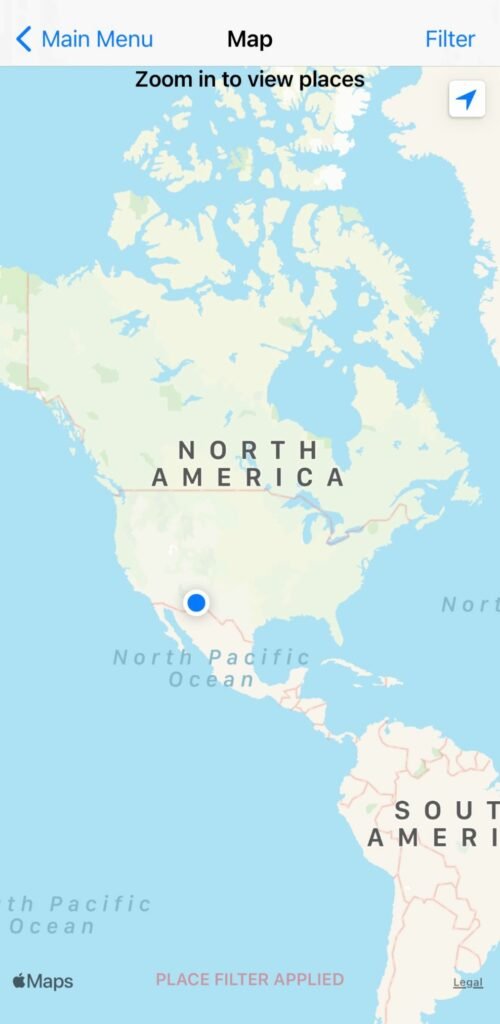
When you first open iOverlander, the app brings you to the main menu. This is the left-hand image you see below. There are three options–view the map, check in, or go to your settings. The two most frequent actions you’ll take are viewing the map and “checking in.” Checking in essentially allows you to annotate that you visited a particular location and leave remarks or tips for future overlanders. The image to the right is the initial view of the map you’ll see. It’s zoomed out so you see the entire US, and you’ll notice that there’s nothing annotated on the map. That’s because in order to view any of the camping spots or points of interest, you’ll need to zoom in.
Below, I did my best to replicate the same map view that I previously showed you on FreeRoam. So if you look at the first image, you’ll see it encompasses Sedona and there are a number of icons with one that’s highlighted: Forest Road 525D. Just looking at this map, you can see that the level of detail that FreeRoam has with its satellite imagery is not included on iOverlander. But some prefer it that way! Once you tap the information “i” button, all of the details for the site will populate. In the image on the right, you’ll see grid coordinates, amenities, reviews, the option to view photos, and when people last checked in to the site.
I’ve found many campsites using iOverlander, and to me, this interface is user-friendly and works just fine, but it doesn’t include some of the more refined imagery features that I love about FreeRoam, like optional layers for satellite maps, cellular service, and elevation. Now, something that FreeRoam doesn’t seem to have yet is the ability to view critical resources and amenities on the map.
Below is an image of iOverlander’s category filter page, where you can decide exactly what resources you want to view on the map. There are 29 different categories and if you turn on too many of these, your map will be busy and overwhelming. I tend to only use the “wild camping” filter because I have other mechanisms to locate most of the resources I need. Something to consider is if you’re camping in a foreign country where you don’t speak the language, iOverlander becomes incredibly useful by assisting you in navigating to important resources that you may not otherwise be able to find.
Something else to consider is that iOverlander can be incredibly helpful–not just in overlanding / camping situations–but during all international travel! There are locations that any foreign traveler might find interesting and useful in an emergency, like restaurants, embassies, wifi, medical services, and customs and immigration locations.
On iOverlander’s site, the creators emphasize the importance of respecting people and other cultures, and like FreeRoam, iOverlander’s creators also reiterate the importance of respecting the environment. You can find more information here on their website. This FAQ page is another useful tool if you’re trying to troubleshoot the app or having technical issues. Bottom line, iOverlander is a helpful resource that you should absolutely be using if you plan to be doing any type of camping or road trip anytime soon.
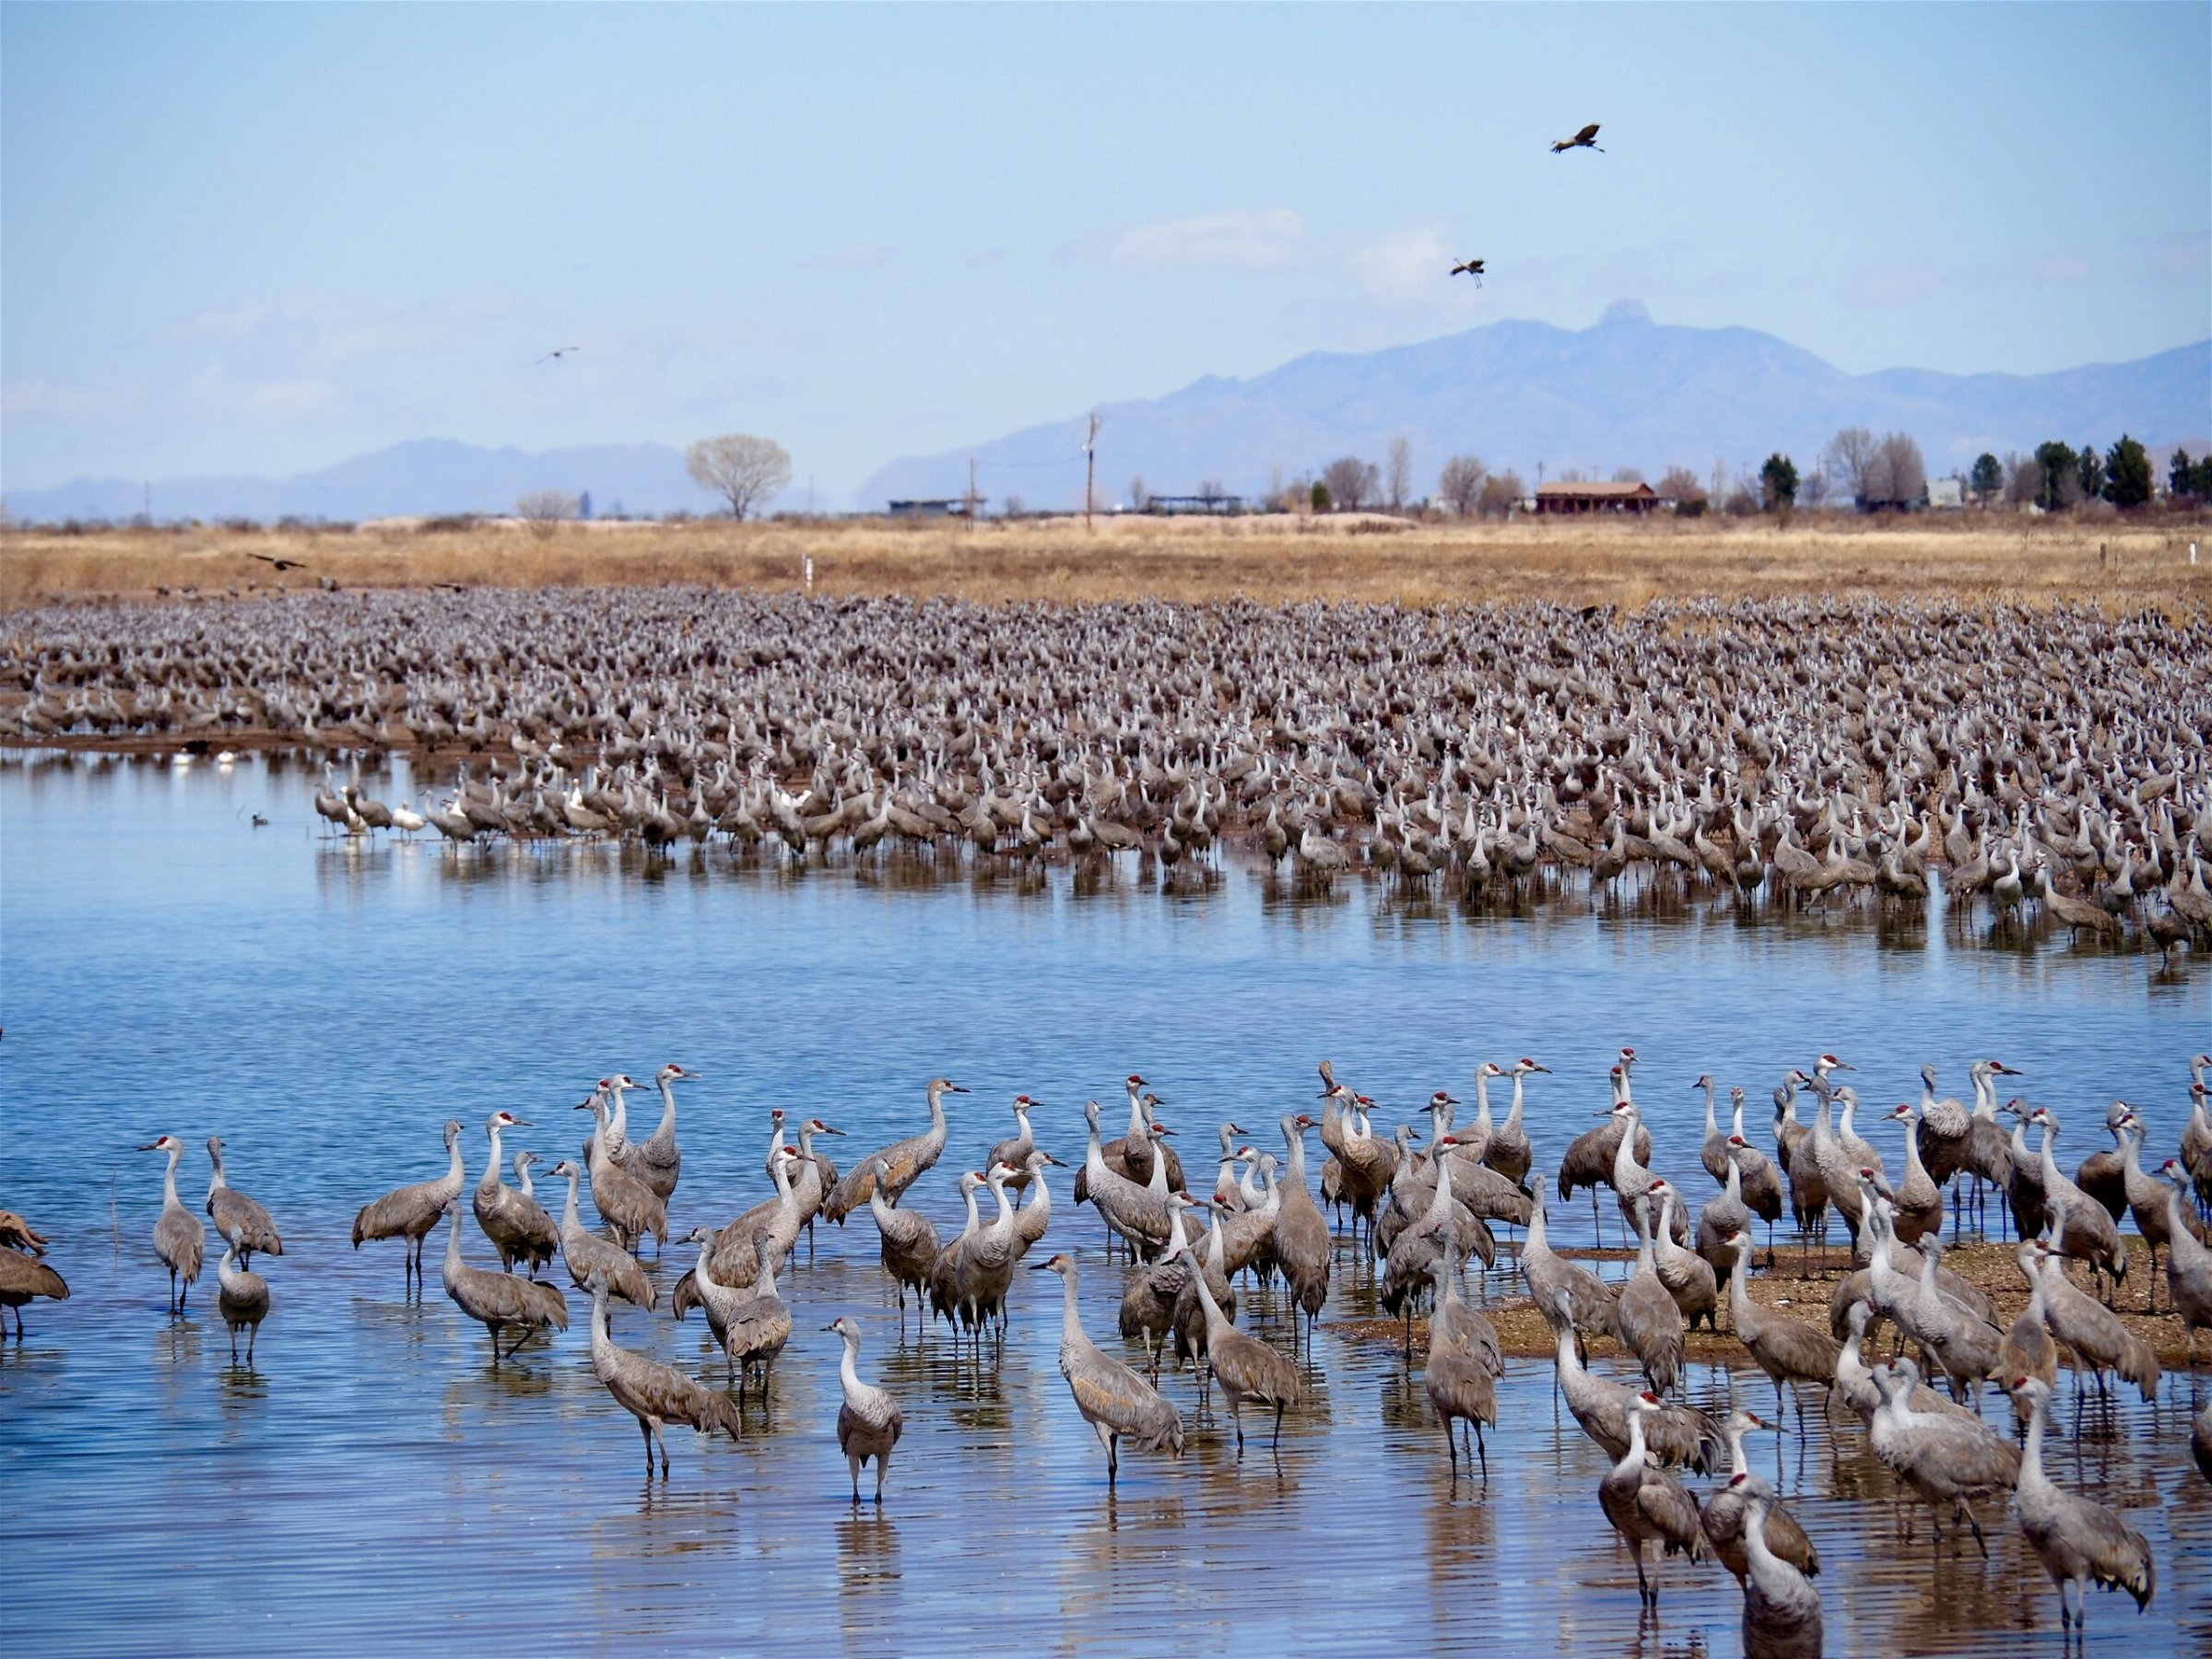
Free camping at Whitewater Draw, Arizona where you can view the annual Sandhill Crane migration.
My favorite thing about both of these apps is that they’re free to use.
They both provide similar information, but I think it’s well worth it to download both of them. While I find myself using FreeRoam more frequently, I actually used iOverlander today when I wasn’t able to find any viable spots on FreeRoam. Remember: FreeRoam has better and more useful imagery, and iOverlander provides more resource information and works internationally. So I think it’s safe to say that neither app is necessarily more useful or “better” than the other. It just depends on your personal preferences, what exactly you’re doing, and what specifically is important to you. So I’d encourage you to give both of them a try!

Gila National Forest, New Mexico.
With these two apps working together, you’ll be able to find free spots to camp all over the country. Some will be near the highway, some will be very remote, some will have beautiful views, some will have burros or cattle, and some will be on top of a mountain. That’s the beauty of boondocking and the benefit of these two apps. You’ll find places to park off the beaten path like the one above in the Gila National Forest.
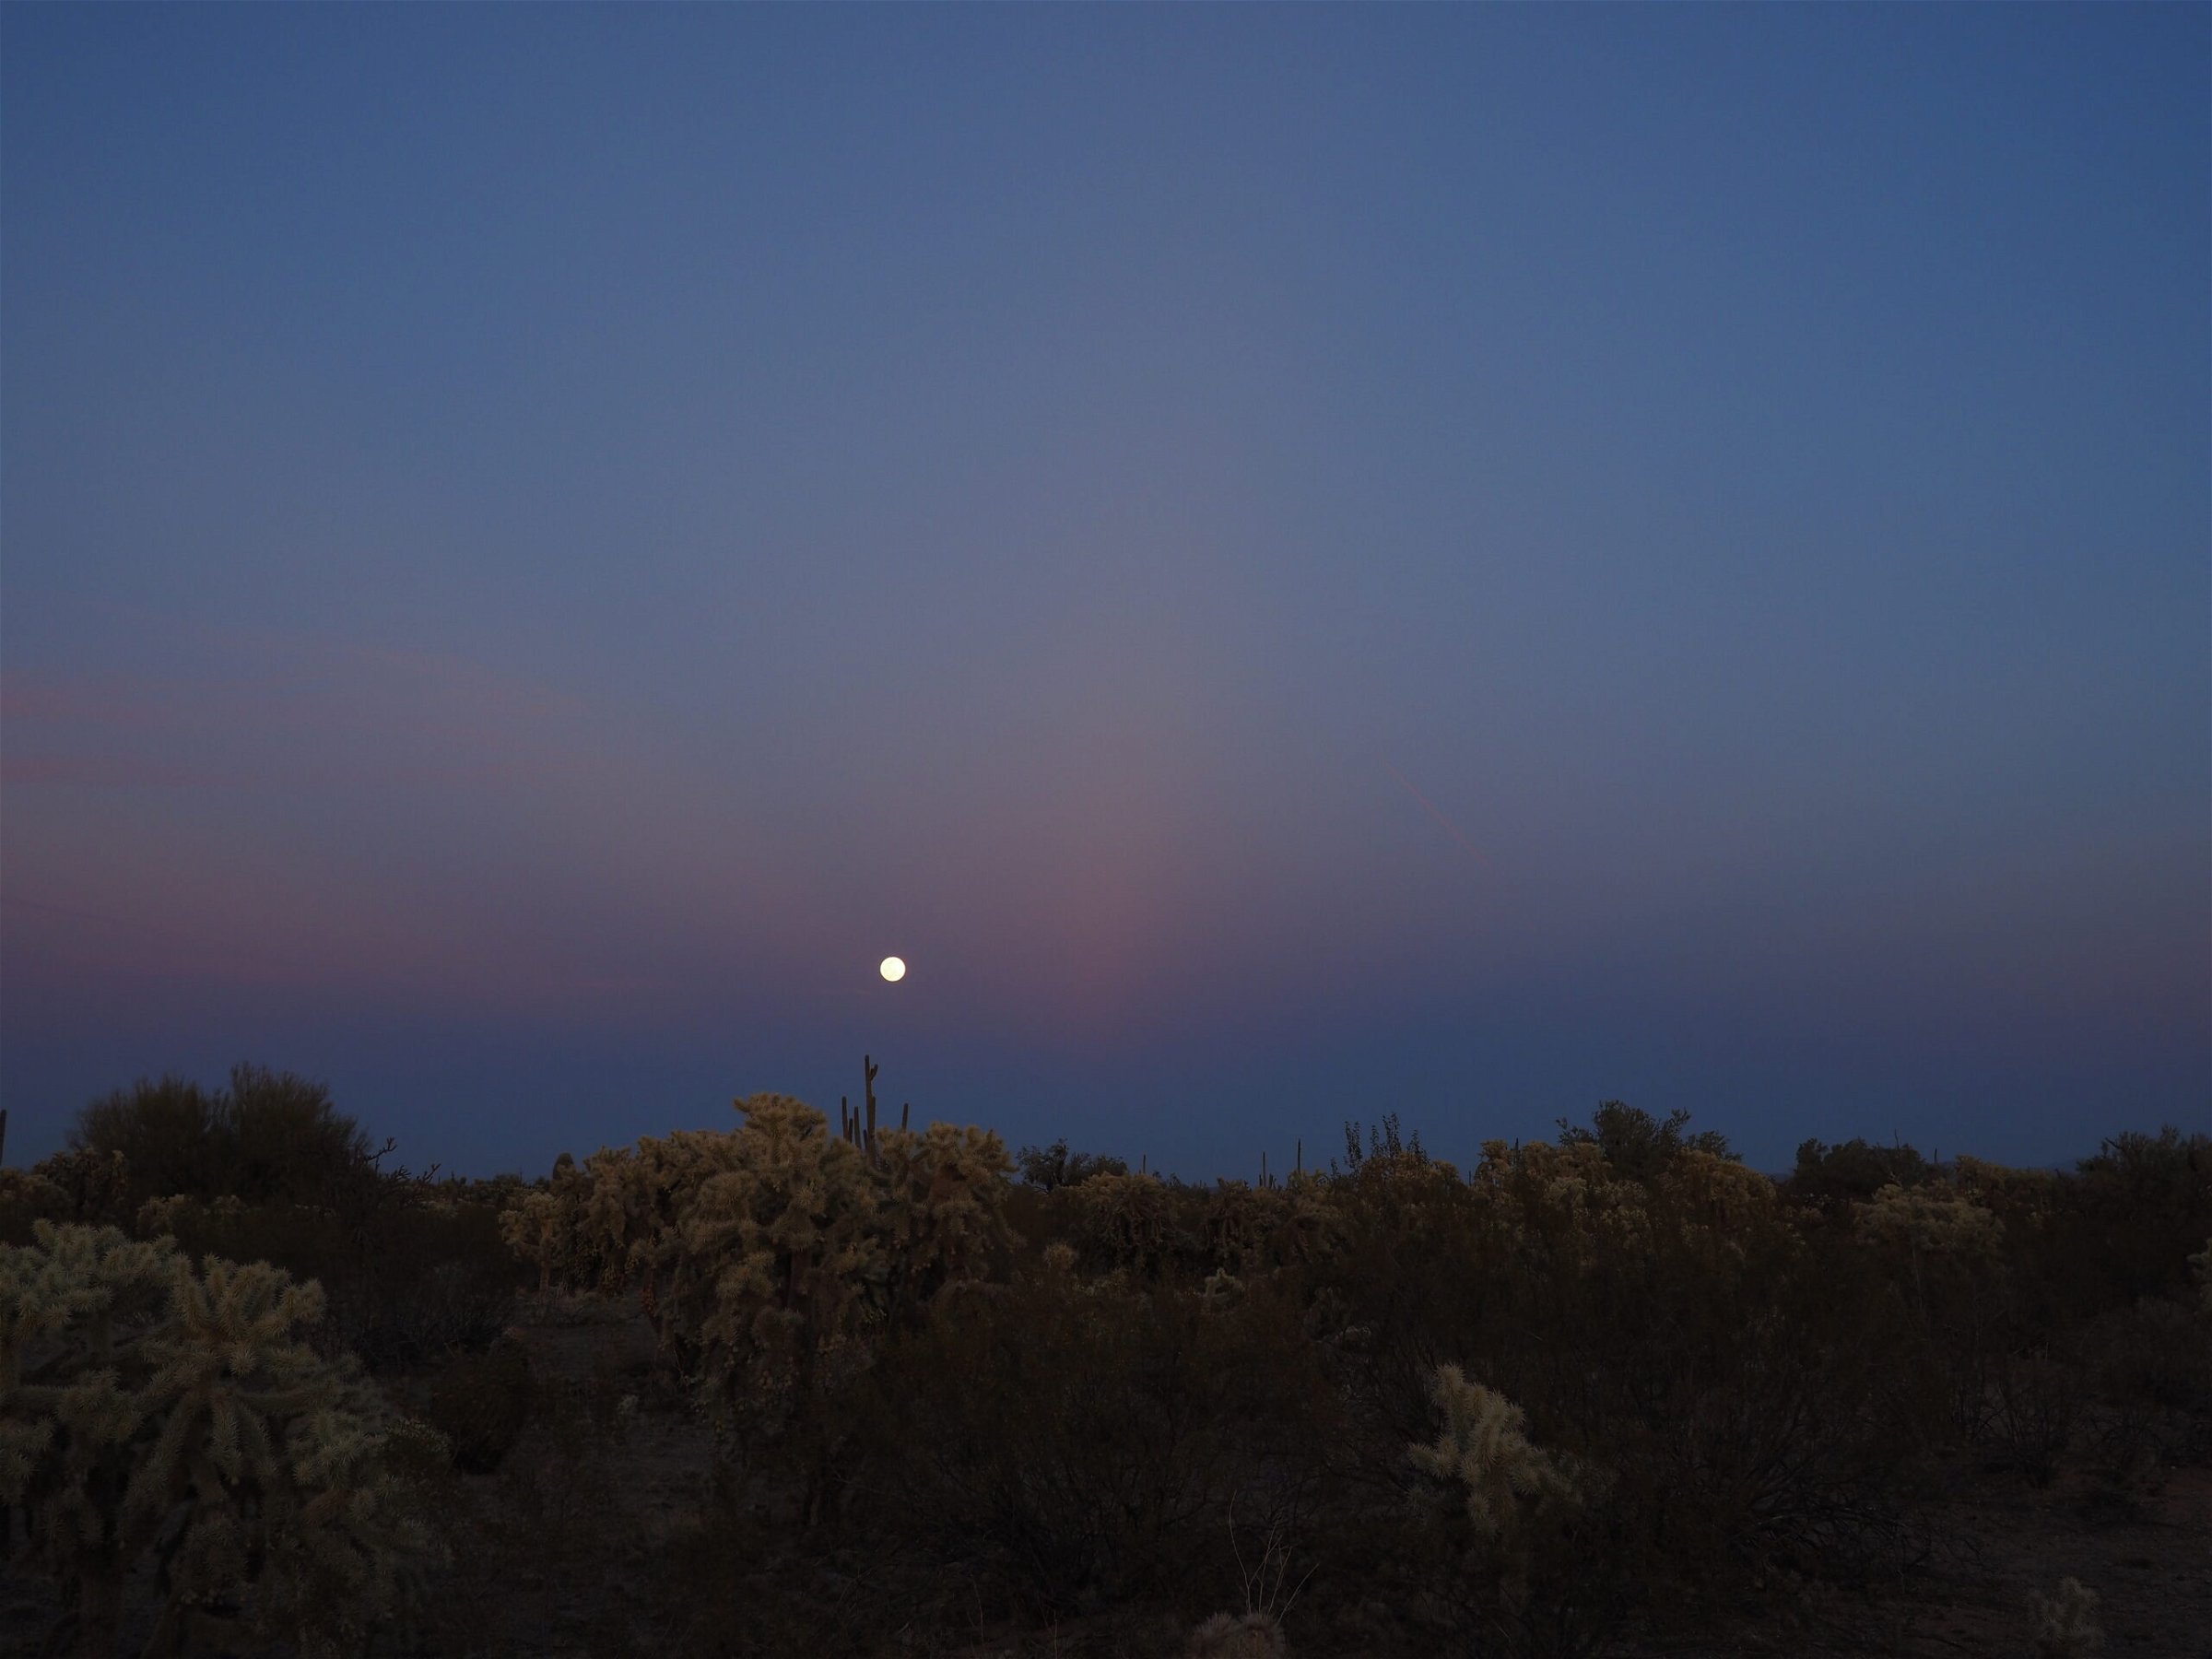
BLM land north of Tucson, Arizona.
Thanks for reading! I hope you enjoy these apps as much as I have. Don’t forget, your contributions–both donations and reviews–enable these apps to work!